-
BAKE OFF Stellar Blade review: Having its cake, and eating it
You're going to enjoy this triple-A action romp, if you overlook the rear-end and don't make an ass of yourself.
-

THOSE WHO PLAY Manor Lords is 2024's must-play strategy game, even in early access – and?a massive win for Game Pass
Slavic Magic has already made one of the best strategy games of 2024 –?in a Manor of speaking (sorry).
-

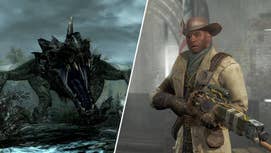
WELL, CAN YOU? Can you play Fallout: London on Xbox and PlayStation consoles?
It's a question you might well have about the highly-anticipated Fallout 4 mod, and we're here to answer it.
-

It's a work-in-progress, but who'd pass up a chance to relive their childhood in Vault 101?
-

DARK THROWBACK Star Wars: Tales of the Empire is bringing General Grievous back, and there's a great explanation behind it
Not every tale in this new mini-series is set during the Empire's reign.
-

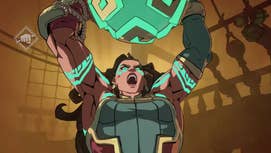
APE RIDERS At this rate, they should call it Kingdom of the Planet of the Apes and Horses
Apes on horses look cool as hell, and Disney knows it.
-

KLUTCH KILLING Helldivers 2's latest Major Order looked a lost cause for days, but the battle has come down to one planet
The defense of Ustotu is on, and it might end up being a close-run thing.
-
STRONG INITIATIVE Roll20 is about to make your Discord tabletop nights a whole lot easier
Psst! Explore our new "For you" section and get personalised recommendations about what to read.
-
.png?width=271&height=153&fit=crop&quality=70&format=jpg&auto=webp)
PEELY SERIOUS Super Monkey Ball Banana Rumble 16-player online mayhem revealed in new Battle Modes trailer from SEGA
Race, blast, and battle your friends for banana domination.
-
SKIP THE BIG MAC Don't Starve studio's co-op roguelike Rotwood sprouts on Steam Early Access: Jump into a world of monstrous encounters for less than a value meal
The world has been thrown into chaos, and it's up to you and your friends to battle the corrupted beasts of the Rotwood.
-

Get the remote play handheld for the PS5 while you can.
-

Deals If you need Fallout 4's ultrawide goodness in the next-gen PC update, we've got the monitor for you
Start gaming in ultrawide resolution for just $250.
-

The Witcher 3 New Game+: How to start and what carries over
Here's everything you need to know about starting The Witcher 3 over in NG+ mode, including what carries over between saves.
-

WAKE UP AND SIGN UP Zenless Zone Zero finally gets a release date, as it soars past 30 million pre-registered players
That figure was reached before 24 hours passed, by the way.
-
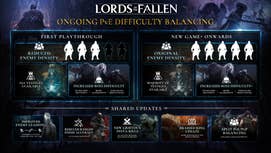
LMAPBEARER'S END Lords of the Fallen's final major update says screw it, lets you balance the game yourself
The Lords of the Fallen roadmap has reached its conclusion, with one last big milestone.
-

Will they pull the trigger, so to speak?
-

YOU'RE FIRE-HIRED Following the kick off of EA Sports FC 24 TOTS, its latest update stops managers from cheekily dodging firings
Bad news if you were planning to take a break from pack openings by roleplaying as an uno-reverse card wielder who gets relegated all the time.
-

Who knows if the truth will ever see the light of day, though.
-

Get the remote play handheld for the PS5 while you can.
-

If you need Fallout 4's ultrawide goodness in the next-gen PC update, we've got the monitor for you
Start gaming in ultrawide resolution for just $250.
-

Best Nintendo Switch deals in April 2024
Find the best Nintendo Switch bundles for OLED, standard and Lite consoles.
-

TREASURE AWAITS Percy Jackson writer sets sail from Disney+ to Netflix as he joins One Piece as co-showrunner
Anime ahoy!
-

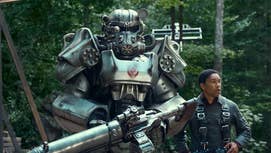
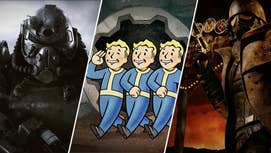
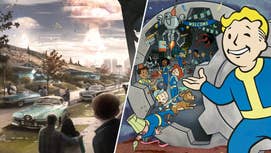
MASS APPEAL FUSION However popular you think the Fallout games are right now, you’re wrong – the numbers are astonishing
Post TV show, Fallout fever's in full flow, and Fallout 4's next-gen update hasn't even arrived quite yet.
-

LOOPHOLE NO MORE Steam just changed its refund policy, but it shouldn’t affect you too much – unless you were gaming the system
Valve clearly wants to keep up with the growing trend of games charging extra money to let players in early.
-
IT'S A GAMBLE Fallout season 2 will feature, er, that iconic location, but you don't need to worry about your headcanon
Your version of events are still yours, no matter what the show says.
-
You have to follow the sweepstakes rules, no x-ceptions.
-

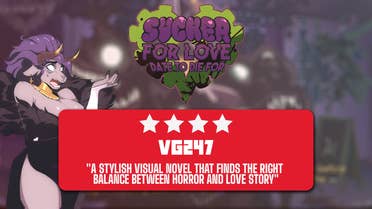
YOU SMOOCH ONE GOAT Sucker for Love: Date to Die For review - '90s anime-inspired romantic horror keeps things short and sweet
The Sucker for Love series continues to play with your expectations for its second outing, rebelling against the genre devices it also lovingly spoofs.
-

There's not much to see just yet, but it is looking lovely so far.
-
Podcast Best Games Ever Podcast - Extended Edition Info Page
All the info you need to get your hands on the for-members-only extended edition of VG247's podcast.
-

TEAMWORK TROUBLE Chill out, Helldivers 2 hardcores trying to get casual players to stick to the battle plan, Arrowhead's doing what it can to help out
"Short of handing you the win, there isn't a lot more we can do."
-

It certainly looks like you'll be in for a weird time with The Watchers.
-
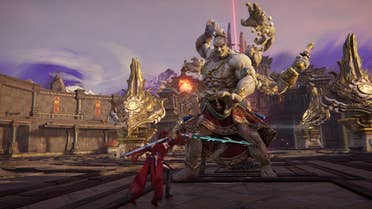
BAKE OFF Stellar Blade review: Having its cake, and eating it
You're going to enjoy this triple-A action romp, if you overlook the rear-end and don't make an ass of yourself.
-
YOU SMOOCH ONE GOAT Sucker for Love: Date to Die For review - '90s anime-inspired romantic horror keeps things short and sweet
The Sucker for Love series continues to play with your expectations for its second outing, rebelling against the genre devices it also lovingly spoofs.
-
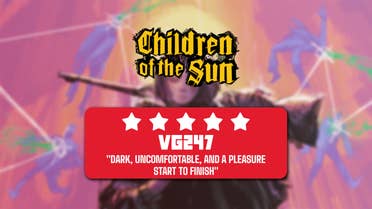
A ‘MAGNUM’ OPUS Children of the Sun review - A moody, emotive sniper-puzzle shooter dripping with style
Children of the Sun is a short but special game that is definitely bang for your buck.
-

TAKING IT SLOW Tom Holland says "everyone wants" Spider-Man 4 to happen, but he's still staying cautious
"We want to make sure we're not overdoing the same things."
-

HAM RADIO SILENCE As Fallout: London's former release date passes by, its lead laments the effects of Bethesda's apparent next-gen update silence
"People are blaming Bethesda, even though I asked them not to, and I think that's inevitable when there's that lack of communication."
-

LaKeith Stanfield is currently in talks to star in the project.
-
JUST A FEW MODS Amid Fallout TV show fever, Nexus Mods says it's been dishing out as much data as downloading Skyrim "twice per second" would involve
Yep, just a casual couple of full Bethesda RPG's worth of mods per moment over the course of several days.
-
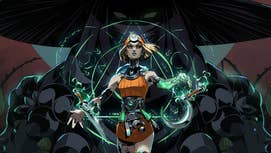
SALTY? Illaoi finally gets gameplay showcase ahead of 2XKO Evo Japan demo
League's very own seaside slugger has her kit explained in length by one of her chief designers.
-

FIGHTING MUSIC "We're trying something out that's very experimental" - Casey Edwards opens up about 2XKO's soundtrack
A chat with Casey Edwards on his journey to 2XKO, and his role on the project.
-
FALL-THAT JAZZ The Best Fallout games: Every Fallout game ranked
You inevitably will when we put Tactics at number one, but please don't get angry.
-

CAN YOU HANDLE IT? EA Sports F1 24 preview - Yes, it might even give you a reason to actually drive the Williams
Logan Sargeant surpassing Lewis Hamilton's win total here I come.
-

IT'S ALL YELLOW Deadpool & Wolverine's first full trailer finally shows a very sad, but faithfully dressed Hugh Jackman
And it introduces us to the film's big bad.
-

SLAVIC MAGIC, INDEED Anticipated indie hit Manor Lords is everyone’s most wanted Steam game, so it’s a good job it’s coming to Game Pass
All eyes are on Hooded Horse and Slavic Magic’s highly anticipated historical city building game, Manor Lords, just days before it launches.
-

PODCAST They'd never get away with THIS nowadays! The Best Games Ever Podcast episode 96
Nowadays, right, you can't even massacre everyone on a football pitch in an ill-advised parody of the first world war, because of woke
-
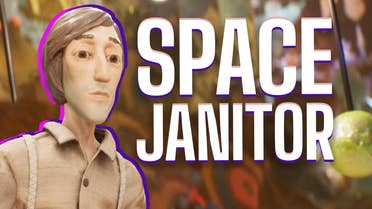
VIDEO An heir to LucasArts? After 8 years in development, Harold Halibut is too good to be a 90s throwback
Part Wallace & Gromit, part Red Dwarf, there's a magic to the way this Game Pass gem blends old and new.
-

RAD ROLEPLAY How to play Fallout 4 as your fave from the TV show
Already binged Amazon's series, and feeling bereft? Try heading into the wasteland as Lucy, Maximus, or The Ghoul
-

FULL FRONTAL Don't worry, Stellar Blade will stay "uncensored" no matter where you live
You'll got the complete experience, it's ok.
-

POST-NUCLEAR PERKS Hopping back into Fallout 4 and want to spice up your new character? One of its top perk overhaul mods just got a fresh revamp
Hot diggity, the ability to hop like a radioactive frog.
-

HANDS OFF Sony's latest patent imagines a future where your PlayStation... plays your games for you?
Who wants to play their own games anyway?
-
NAMESAKE No Rest for the Wicked is already making some of its most most annoying mechanics better
No Rest for the Wicked wrapped up its first weekend with a duo of hotfixes that definitely made a few things better.
-
ONE BECOMES THREE After laying off over 1000 people, Embracer Group makes itself some friends by splitting into three companies
Hopefully this is the beginning of the end for layoffs at the company.
-

Democracy's waited, and now it should be back on track!
-

TROPHY TROUBLE UPDATE: With Fallout 4's next-gen update just days away, the game's achievement unlocking issues on Xbox should now be solved
Achievement now actually unlocked: Return to The Commonwealth.
-

GOOD, AD, UGLY? The first 4 episodes of the Knuckles TV series feel like a fever dream – for better, and for worse
What if The Mighty Boosh, Sonic the Hedgehog, and some of the most egregious product placement you’ve ever seen had a baby?
-
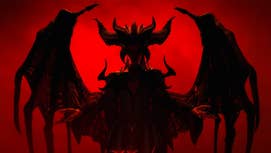
BLOODY GOOD TV A Diablo show isn't in the works, but the head of the series certainly likes the idea of one
An animated series was supposedly in development at one point in time.
-

SHY GUY FTW There's over 700,000 possible builds in Mario Kart 8, and science has determined the best one
It'll never beat your favourite, though.
-

BE A PAL Palworld Guide: How to become a Pal Master
Get the most out of the wild islands of Palpagos with our Palworld Guide!
-
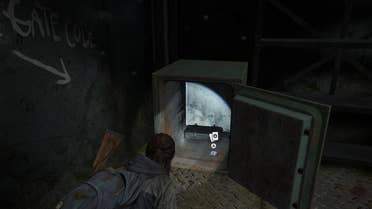
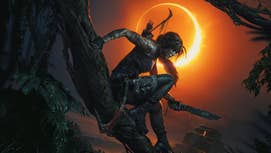
The Last of Us 2 safe codes and combinations - all safe locations
All the safe codes and their locations in The Last of Us 2.
-
Naraka Bladepoint Tier List: Best characters for Solos and Trios
These are the best characters in Naraka: Bladepoint as decided by the top pro players!
-
THE BEGINNING The Fallout TV show’s good, but Bethesda shouldn't be afraid to let the series out of its Vault-Tec liveried box
War may never change, but that doesn’t mean Fallout’s world needs to stand still.
-

A NUCLEAR APPROACH Fans might like Fallout 3 now, but back when it was announced there were so many death threats Bethesda had to hire a security guard
Always a good time to remember that they're just video games, people.
-
COOL YOUR JETS Hades 2 isn't even out yet, and Supergiant is already having to ask people to stop datamining it
You can hold off looking at all those beautiful gods, can't you?
-

SIMPLY INFECTIOUS Dragon's Dogma 2's next update will tone down Dragonsplague, so you can stop complaining about it now
There'll be several other fixes and tweaks, too.
-

BOP TO THE TOP What's next for Helldivers 2? Making it "the best live service game you've ever played"
"We just need to find our stride and balance."
-

PLAY WITH NOTHING LittleBigPlanet 3's servers are staying offline "indefinitely" meaning more than a decade's worth of user-made levels are gone for good
The servers were taken offline in January, but were planned to be restored originally.
-

FORAGING FOR HERBS No Rest for the Wicked makes a killer first impression, but I’m worried about all the crafting and survival guff
I am wary about how No Rest for the Wicked's mechanics could drive players away over time.
-

SUPERHERO DRAMA Michael Douglas requesting Hank Pym to be killed off in Ant-Man 3 highlights the MCU's recent lack of stakes
There have been exceptions, but it's largely felt toothless as of late.
-

RAD ROLEPLAY How to play Fallout 4 as your fave from the TV show
Already binged Amazon's series, and feeling bereft? Try heading into the wasteland as Lucy, Maximus, or The Ghoul
-

HIGH WATERMARK “We put everything into this expansion” - Final Fantasy 16’s DLC director speaks on the game’s final content drop
Final Fantasy 16 is finally complete, with its final DLC out now. We catch up with the director of the add-ons to talk about what's new for Rising Tide, and how to successfully close out Clive's adventures.

Editor-in-chief

Assistant Editor

News Editor

Senior Staff Writer

Staff Writer

Guides Editor

Guides Writer

Guides Writer

Video Producer

Deputy Editorial Director ReedPop